Questions
- How do I use breakout rooms in Zoom?
- How do I create breakout rooms during a Zoom meeting?
- How do I pre-assign participants to breakout rooms before a meeting?
- How do I set up polling in Zoom?
- How do I use non-verbal feedback in Zoom?
- How do I enable breakout rooms in my Zoom account?
- Can I automatically assign participants to breakout rooms?
- How do I import a CSV to pre-assign breakout room participants?
Environment
This article applies to Bowdoin faculty, staff, and students who host Zoom meetings. Breakout rooms can only be started by the host. Polling and non-verbal feedback must be enabled in your Zoom account settings before they appear in meetings. Instructions use the Zoom desktop app and web portal.
Resolution
Jump to a section:
Enable Features Non-Verbal Feedback Polling Breakout Rooms Pre-Assign Participants
Step 1: Enable These Features in Your Account Settings
Polling, non-verbal feedback, and breakout rooms must each be turned on in your Zoom account settings before they appear as options in meetings.
- Go to bowdoin.zoom.us and sign in with your Bowdoin credentials.
- Click Settings in the left navigation.
- Click the Meeting tab and scroll to the In Meeting (Basic) section.
- Toggle on Polling and Non-verbal feedback. Each toggle turns blue when enabled.
- Continue scrolling to the In Meeting (Advanced) section.
- Toggle on Breakout room. If you want to be able to pre-assign participants when scheduling, also check Allow host to assign participants to breakout rooms when scheduling.
↑ Back to top
Non-Verbal Feedback
Non-verbal feedback lets participants signal responses — such as yes/no, slow down, speed up, or thumbs up/down — without interrupting the speaker.
- During a meeting you are hosting, click Participants in the bottom toolbar.
- The Participants panel opens on the right. At the bottom of the panel, participants can see and click non-verbal feedback icons to respond to questions or signal reactions.
- Responses appear next to each participant's name in the Participants panel, visible to the host.
↑ Back to top
Polling
Create and Launch a Poll During a Meeting
- During a meeting you are hosting, click Polls in the bottom toolbar.
- A window opens where you can create a new poll. Enter a poll name, then add one or more questions.
- For each question, choose Single choice or Multiple choice, enter the answer options, and optionally check Anonymous to hide individual responses.
- Click Add a Question to include additional questions in the same poll.
- Click Launch Poll to send it to participants immediately. Results appear in real time as participants respond.
Create a Poll in Advance (Before the Meeting)
- Go to bowdoin.zoom.us and click Meetings.
- Click the name of the scheduled meeting to open its detail page.
- Scroll to the bottom of the page and click Add next to the Poll section.
- Enter a poll title and create your questions, then save.
- When the meeting is underway, click Polls in the bottom toolbar, select the pre-created poll, and click Launch Poll.
↑ Back to top
Breakout Rooms
Breakout rooms split a Zoom meeting into up to 50 separate sessions. The host can move between rooms, send messages to all rooms, and close all rooms to return everyone to the main meeting.
Create Breakout Rooms During a Meeting
- During a meeting you are hosting, click Breakout Rooms in the bottom toolbar.

- In the dialog that appears, choose how many rooms to create and how to assign participants:
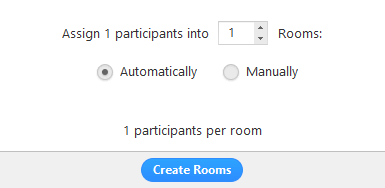
- Automatically: Zoom divides participants evenly across the rooms.
- Manually: You choose which participants go into each room.
- Click Create Rooms. The rooms are created but do not start automatically.
- Click Open All Rooms to send participants to their assigned rooms.
Manage Breakout Rooms in Progress
Once rooms are open, participants receive a prompt to join their room. The host remains in the main meeting until joining a room manually. If a participant has not joined yet, (not joined) appears next to their name.
- Join: Click to enter a breakout room as the host.
- Leave: Return to the main meeting from a breakout room.
- Close All Rooms: Sends a 60-second countdown to all rooms, then returns everyone to the main meeting.
Breakout Room Options
After creating rooms, click Options to access additional settings:

- Move all participants into breakout rooms automatically: Participants are moved without needing to click Join.
- Allow participants to return to the main session at any time: Participants can leave their breakout room and return to the main meeting on their own.
- Breakout rooms close automatically after X minutes: Rooms end after the configured time.
- Notify me when the time is up: The host receives an alert when the time limit is reached.
- Countdown after closing breakout rooms: Participants see a countdown before being returned to the main meeting.
↑ Back to top
Pre-Assign Participants to Breakout Rooms
You can assign participants to rooms before the meeting starts, either through the Zoom web portal or by uploading a CSV file.
Pre-Assign via the Zoom Web Portal
- Go to bowdoin.zoom.us, click Meetings, and schedule a new meeting (or open an existing one).
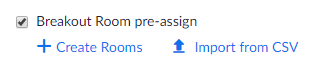
- In the Meeting Options section, check Breakout Room pre-assign and click Create Rooms.
- Click the + icon next to Rooms to add breakout rooms.
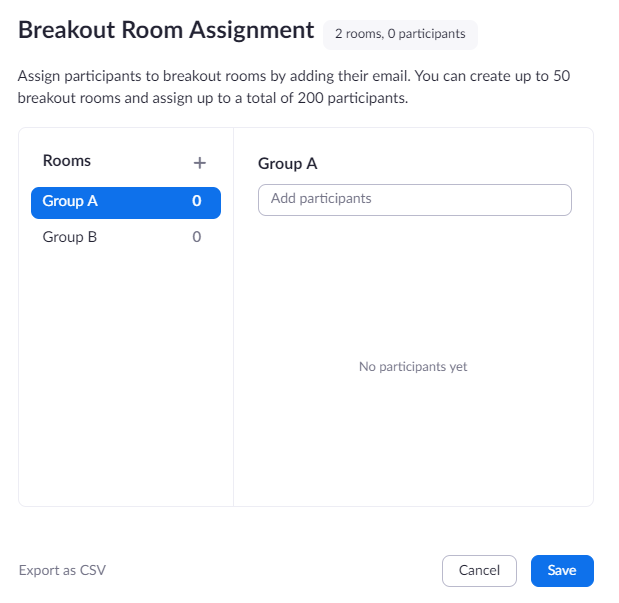
- Hover over a room name and click the pencil icon to rename it.

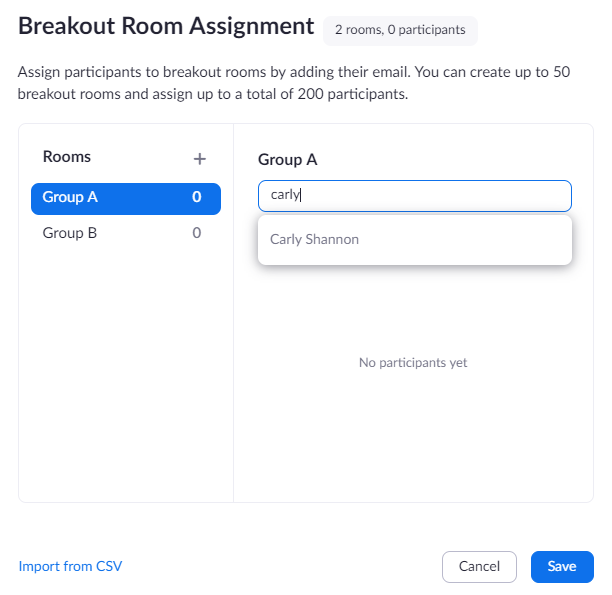
- In the Add participants field, search for a participant's name or email address and select them to add them to the room.
- To move a participant to a different room, hover over their name and choose Move to. To remove them, choose Remove.
- Click Save when finished.
Note: You can pre-assign internal Bowdoin Zoom users by name or email. To pre-assign external Zoom users, use the CSV import method below.
Pre-Assign via CSV File
- Go to bowdoin.zoom.us, click Meetings, and schedule or open a meeting.
- In Meeting Options, check Breakout Room pre-assign and click Import from CSV.
- Click Download to get a sample CSV file. Open it in Microsoft Excel or another spreadsheet app.
- Fill in the Pre-assign Room Name column (do not use spaces in room names) and the Email Address column for each participant.
- Save the file, then drag and drop it into the Zoom web portal import area.
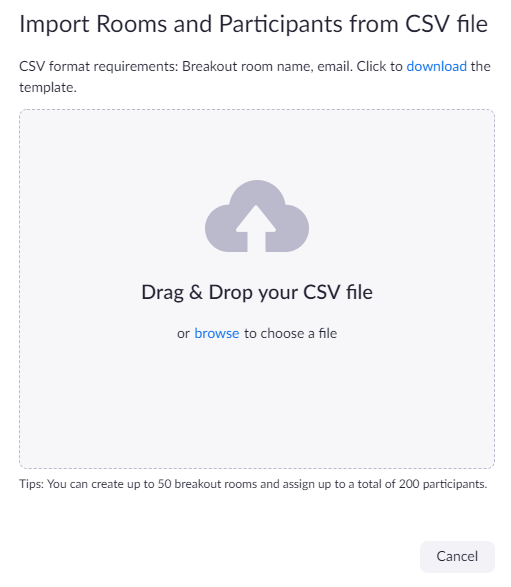
- Zoom will validate email addresses against existing Zoom accounts. Click Save once the import is complete.
↑ Back to top
Additional Help
If you need further assistance, you have several options:
- Bowdoin Bot: Chat with Bowdoin Bot directly from any KB page for instant answers.
- Phone: Call the Bowdoin College Service Desk at (207) 725-3030.
- In person: Visit the Tech Hub in Smith Union during business hours.
- Submit a ticket: Request assistance through the Service Catalog.
Additional Resources